
Using the new selective deletion functionality in SAP DSP to track record deletion in the source (part 1)
With the latest update of SAP Datasphere, it is now possible to create selective deletions on your local tables created in SAP Datasphere. Obviously, this opens a whole new world of possibilities. One of them is to be able to handle deletions in the source, and even track them in your SAP Datasphere environment. In this series of blogs, I will explain how you could set up such a scenario. In this first blog I will explain how the new functionality for selective deletions on local tables in SAP Datasphere is used.
The new functionality to do selective deletions on your local tables is available from the Data Integration Monitor. From the Local Tables we are able to jump into the settings for a specific local table in SAP Datasphere:

We now get into this new screen:
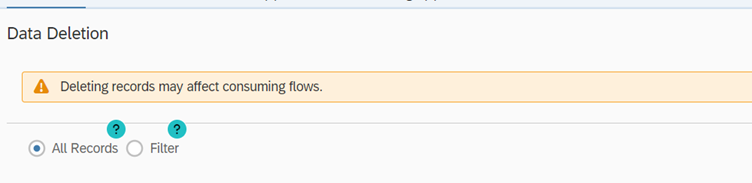
We are quite easily able to either delete all the records, or selectively delete records from a table based on the value in a column. It is also possible to do this on the values of multiple columns, instead of just one, to really make the deletion specific.
When using the Filter option we have quite a few options to make the correct selection of data that has to be deleted from the local table in SAP Datasphere:
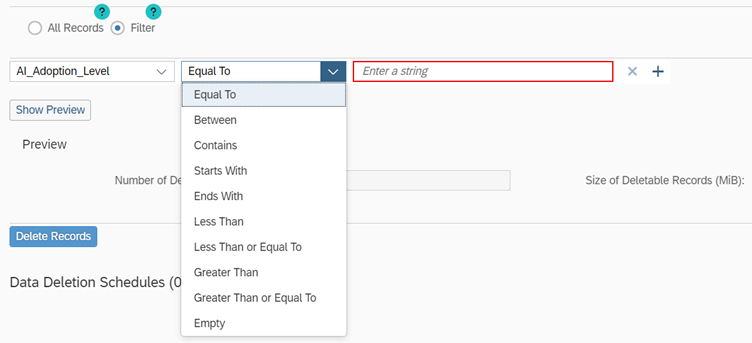
When we have selected the value that we want the deletion to happen on, we can click the Show Preview option to actually show what will be deleted.

This pops up a preview of the data that will be deleted. I expected that this would just be a subset of records, but SAP Datasphere is actually giving a preview of the data that will be deleted, which gives a nice confirmation of what is going to happen.
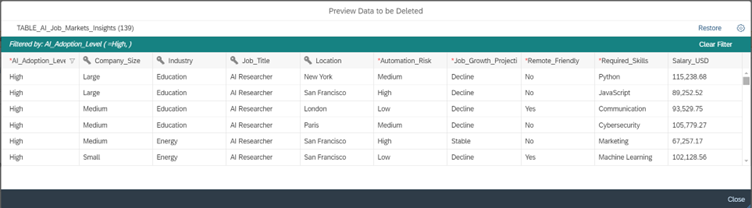
When clicking on the refresh button in the previous screen we get another confirmation of the number of records that is going to be deleted and the size of the records that will be deleted. With this you could get a nice estimate of the results of your action, and if you need to broaden or narrow your selection to free up more or less space.

Now when we press the button SAP Datasphere will start the deletion of our data based on the criteria.
In the Data Deletion Logs tab, we can keep track of the deletions that previously happened on this table.
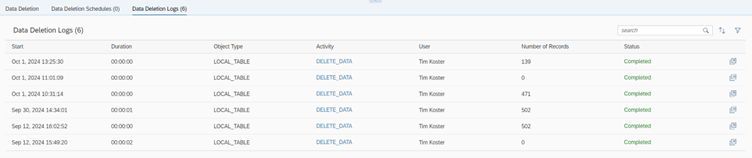
We are also able to jump into more detail in what the deletion was by clicking the arrow in window button on the right. Unfortunately, at this moment in time it is not yet possible to see what the delete statement was based on, it will just show you the amount of records deleted.

Creating a Data Deletion Schedule
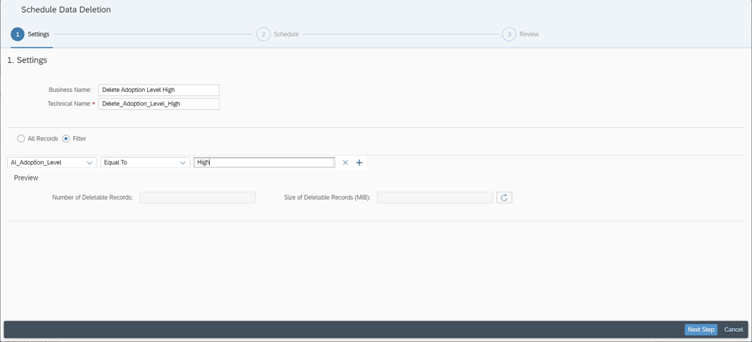
In the same way as manually deleting data you can also set-up a schedule to selectively delete data. We can create a schedule by following the wizard. The first step is to define a business name for the deletion schedule and give the filter values to delete on:
The second step is to define a schedule in the same way that we can define a schedule for data loading.

Finally in the last step we get an overview of what we scheduled.
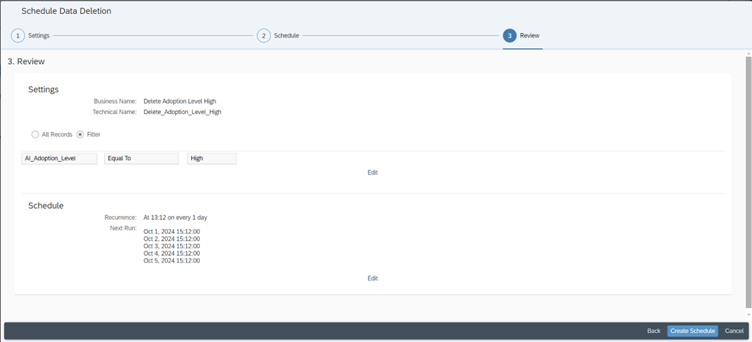
Unfortunately, there is no clear overview over the next deletion that will take place, which I think is something that would add value to have. We can however differentiate the scheduled deletions from the manual deletions because the object type is different:

Another thing that I really miss at this moment in time is the possibility to schedule the selective deletion in a Task Chain. For the use case that we are going to build in the next blog this would be awesome to have.
Conclusion
The new selective deletion functionality in SAP Datasphere provides a powerful way to manage data within local tables. It allows users to selectively remove records based on specific criteria, offering a preview feature to verify what will be deleted. While there are some limitations—such as the lack of a clear overview of scheduled deletions and the inability to add deletions to a Task Chain—this functionality still offers significant control and flexibility.
Particularly for scenarios where data is loaded from external sources like flat files with “full updates,” this feature helps manage deletions effectively. By combining it with the power of joins, users can track new, existing, and deleted records, maintaining a clean and up-to-date data environment. Stay tuned for the next blog post, which will explore a practical example of how to leverage this new capability to its fullest potential.